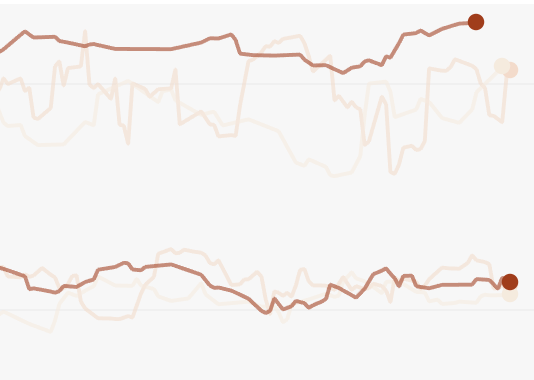
Once you have Tableau desktop activated and running – open any data set. We use the Super Store Subset for our tutorial example and want to visualize the running average of profits.
We like using running averages to smooth out the lines and clearly show what’s happening per Category.
#2 Building a Sparkline chart – Make a line chart.
Usually, we would drag this part of the tutorial out, but if you’ve made it this far, you already know to double-click your measure, change the marks to a line chart, and have a date on the other axis.
If you need more assistance building a line chart, check out Tableau’s extensive Online Help.
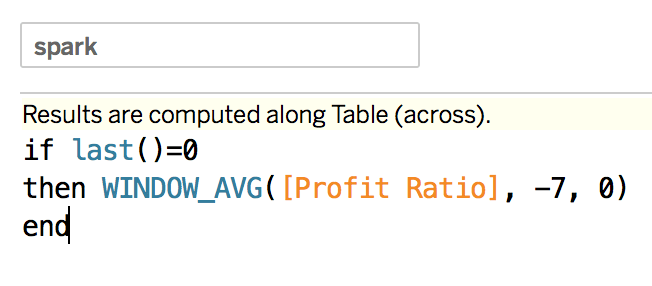
#3 Building a Sparkline chart – Build a calculation.
We’ve seen a slew of scary-looking calculations over the years – especially regarding sparklines.
You don’t need anything complex for this portion of the work.
if last()=0 then MEASURE end
//that’s all folks.
You can drag and drop any table calculation you’ve generated into a calculation and be done with it! Here’s what our running average calculation looks like in the screenshot below.
Understanding Tableau Calculations is the first step to offering quality user experiences.
For the sake of the demo, let’s call your sparkline calculation spark.
Drag this next to your measure value – your current line chart in Tableau.
#4 Building a Sparkline chart – Dual axis your measure with your spark calc.
Next, to create the “sparkline in Tableau desktop,” you must add both measure values, dual axis, and synchronized.
Dual axis your measures.
Dual axis your measure with your sparkline calculation.
Right-click your measure
And click dual-axis
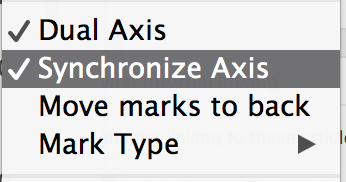
#5 Building a Sparkline chart – Synchronize axis.
Step 5 – synchronize the axis to ensure your upcoming sparkline chart is on point on your line chart.
If you don’t see your header, right-click on the measure and show the header.
Click on Synchronize Axis, and you will probably see the light now.
To ensure your sparkline circle lines up with your line – synchronize the axis.
#6 Building a Sparkline chart – Hide Indicator.
You’re nearly completely done! There’s an indicator showing your ‘lack of an else’ in your if statement. Avoiding the ELSE is essentially fewer computations for your computer and Tableau. Leaving off else lets us avoid bothering with writing extra code, too.
if last()=0 then MEASURE //ELSE 0 — not necessary end
And because there’s a clear void in the data, the indicator will appear – we didn’t break anything, and the product is working as intended!
The Tableau definition from every darn place on the internet.
Why did we consider this?
Because a lot of people are interested, what does Tableau mean?
We know the tableau definition means; visualizing and understanding data. We are Tableau consultants and have experience using Tableau Desktop and Tableau Server.
However, if you look at #tableau on twitter or instagram, you can see other people around the world use the word Tableau when speaking about artwork!
Learning about Tableau definition? What is this Tableau everyone is talking about? This is the company logo for a data visualization company called Tableau.
We remember the first time looking up the Tableau definition too!
Several different sources explain the Tableau definition throughout the internet. Google defines Tableau and also offers a visual representation of the usage of the word in three different formats, really spectacular insights. Google does the best job at not only defining the term but also offering analytics regarding the usage of the word since the 1800s.
tab·leau
ˌtaˈblō/
noun
a group of models or motionless figures representing a scene from a story or history; a tableau vivant.
What can we take from Google’s Tableau definition and analytics?
Something interesting to notice is even though the products of Tableau have proliferated the usage of the word, it has steadily declined and not seen an increase due to the companies usage of the name. Even though you’d believe it would be spiking because of the usage of the product, rather it’s steadily been in decline since 1980.
Thesaurus.com goes at this from the plural version, or I just clicked on the wrong thing, regardless let’s comprehend what tableaux symbolizes. Maybe it can help us paint a picture.
Tableau Desktop is a living data picture generator. It’s the life of your business.
We can reach that the usage of the word in google searches is due to the products evolution and growing user base. The founders of tableau did a superb job picking the name Tableau.
They chose a brand name from an old term that is declining in usage, defined similar to the products, and not impacted by the company picking it up. Genius.
A well-executed brand name pick, and something to take note of before deciding your next company name. Hats off to the founders at Tableau for doing their due diligence.
Tableau Server is the stomping ground for Tableau Desktop Dashboards! Also, welcome to the fastest growing business intelligence tool ever.
Tableau Server has very natural user functionality and security measures for any enterprise setup. We have experience implementing 80+ tableau servers and these are 1 week engagements, onsite, helping customers like Kroger, Boston Scientific, and many more. For more info ping our Tableau Consulting page.
Tableau Server is where end users come to consume reports, dashboards, administrate over metadata usage, and conduct data discovery.
Tableau Server is an application developed by Tableau Software. Tableau Server is self-service analytics at scale.
Share Tableau Desktop Dashboards on Tableau Server
If you need to share Tableau visualizations, with company data, across your corporation, Tableau Server is a great option. Tableau workbooks shared between desktop licenses, Tableau Reader, on Tableau Public, Tableau Online, and Tableau Server.
If you need to share Tableau visualizations, with company data, across your corporation, Tableau Server is a great option. Tableau workbooks can be shared between Tableau Desktop licenses, Tableau Reader, on Tableau Public, Tableau Online, and Tableau Server.
Tableau Server keeps your proprietary data behind whatever firewall you want or need; Tableau Online is a cheaper alternative that is hosted by Tableau Software. Tableau Public is a public space to share content, and we recommend not posting your company data on Tableau Public.
Last but not least, Tableau Reader can consume a TWBX workbook. It’s a free means of consuming packaged workbooks. Some companies use Tableau Reader as a free workaround to Tableau Server or Online.
Install Tableau Server Internally or Externally?
VPS and Cloud servers will always be a slower options VS Dedicated hardware. A dedicated machine can be a costly expense and also not as easy to scale more hardware on the computer. A double edged blade, choose wisely!
Tableau Server on a Third-party host?
Tableau server can be Installed internally or with hosting company.
If you don’t have a tech team, owning Tableau Server may be difficult. Tableau server is the option when you need to keep your install in-house or on a flexible deployment like Microsoft Azure, Amazon Web Services, or Google Cloud Platform.
Can Tableau Server be used as a Data source?
Yes indeed!
Tableau Data Source, aka TDS, can be used as a data source. A major data governance buff to all database admins. A TDS is a viable replacement for database credentials if you’re ever concerned about any users locking up the database with corrupt queries.
Tableau Server is your Safe Place in Business Intelligence
Tableau Server is a safe place to share Tableau Dashboards, and Tableau Server can be used as a data source! Tableau Server as a data source leads to an interesting topic and great workaround for IT teams.
Server is the safe space for end users to consume approved data sources, without the need to put the end user in a development environment and give them database access, Tableau cut through the usual processes.
Tableau Server as a data source removes the need to give anyone database access; you can schedule refreshes at an appropriate time and give users access to the Tableau Server layer versus the database layer.
How Does Tableau Server Generate Less Support?
Tableau Server as a data source also removes support for end users running rogue queries.
A rogue query is built by anyone who doesn’t understand the database outage schedule. They run a query that will never end and lock up the data source. The rogue query runs during lunch or while they go home. Everyone comes back to work and turns out none of the database jobs worked, and everything is out of sync. What happened?
Less Data Downtime with Tableau Server
Your information technology team can plug this in, and hand it off to the business quickly. Everything is documented online, and if you follow all the steps everything will work! If it doesn’t work, contact the support, and they will help you out quickly and efficiently.
Less Downtime in Business Intelligence?
Less downtime would be great and a challenging business intelligence platform that requires countless hours of training is not beneficial to a fast paced company. Well, this is again where Tableau shines because Tableau Server is an easy GUI platform and you don’t need to be a developer to use it.
Tableau server is revolutionary because it’s not hard to use. Let your IT support the hardware and let the business support Tableau Server. TS now puts the company in action mode. And users can jump in and make instant traction on projects without the usual slow wheel of the IT teams.
Tableau server admins now work harmoniously with end users on a simple web portal. Now, on the front end, just plugging into the web portal, with a user experience easier than any business intelligence product software alive.
Tableau Server is Easy to Install. If you aren’t dealing with a fake team…
Tableau Server is a simple .exe, a few clicks, and installs in a few minutes if you’re passing minimum requirements. Because it’s simple, anyone is taking clients with fake teams!
Do you want to know who is fake? Contact us and we will show you on video chat!
Fake companies onshore and offshore are now pretending to take on clients, but the truth is they outsource their work and clients are starting to complain to us a lot about this new addition of fake firms.
Be on the lookout for blogs that do not explain impacts as we do below. Hundreds if not thousands are using spam metrics to inflate their rank but they are all offshore faking onshore teams. We’ve found several in the top 10 ranking across every top searches on Google.
Our opinion on business intelligence.
If any SAP architect, consultancy, or company ever sat down and did a single hour of making a change in the actual software. Then asked me to do it in Tableau – they would understand why I’ve made a living doing simple solutions in a beautiful product.
Instead of a six-month project to build a single data warehouse, we can generate powerful reporting suites in hours, and because of that I went and worked at the company immediately.
Why Tableau Server?
Tableau Server is a great business intelligence win if you want to avoid unnecessary technology solutions that constantly require support and remediation. And better yet, it allows for front end data warehousing and the expensive ETL suites are typically never necessary.
Installing Tableau Server the First Time
Okay, before you buy it, just test it out. Get IT involved, get networking involved, get database guru involved, and get the administrators taking over the install involved!
All failed projects surrounding the basics fail due to poor project management skills and lack of communication to the important parties.
Check with your IT team to determine if your environment can support it. Check with your local data guru to see if they can determine the connectivity between the data source, Tableau desktop, and Tableau server.
Things to consider before installing Tableau Server.
Let’s start with the first step. Do not rush into the setup clicking next-next-next. I’ve had to reinstall a lot of these after consultants and clients rushed through this process. There are a couple of things to consider before beginning.
Can Tableau Server be Installed on the same machine as the Database?
Tableau Server should not be competing for resources with a Database on the same computer. TS with the Database on the same computer is not a good practice.
Where Can I Install Tableau Server?
Install Tableau Server on the D drive and not the C drive.
Tableau Server native install suggests you install it under program files. Do not do that and always avoid installing software on the same drive as your operating system.
If you installed it on the C drive, it also installs content under the program data directory. /Program Data/ is a hidden directory. If you ever do a reinstall and want to put it on the D drive. Be sure to remove that drive.
Learn how to optimize images or Tableau Desktop is slower. Optimize images in Tableau Desktop before publishing to Tableau Server.
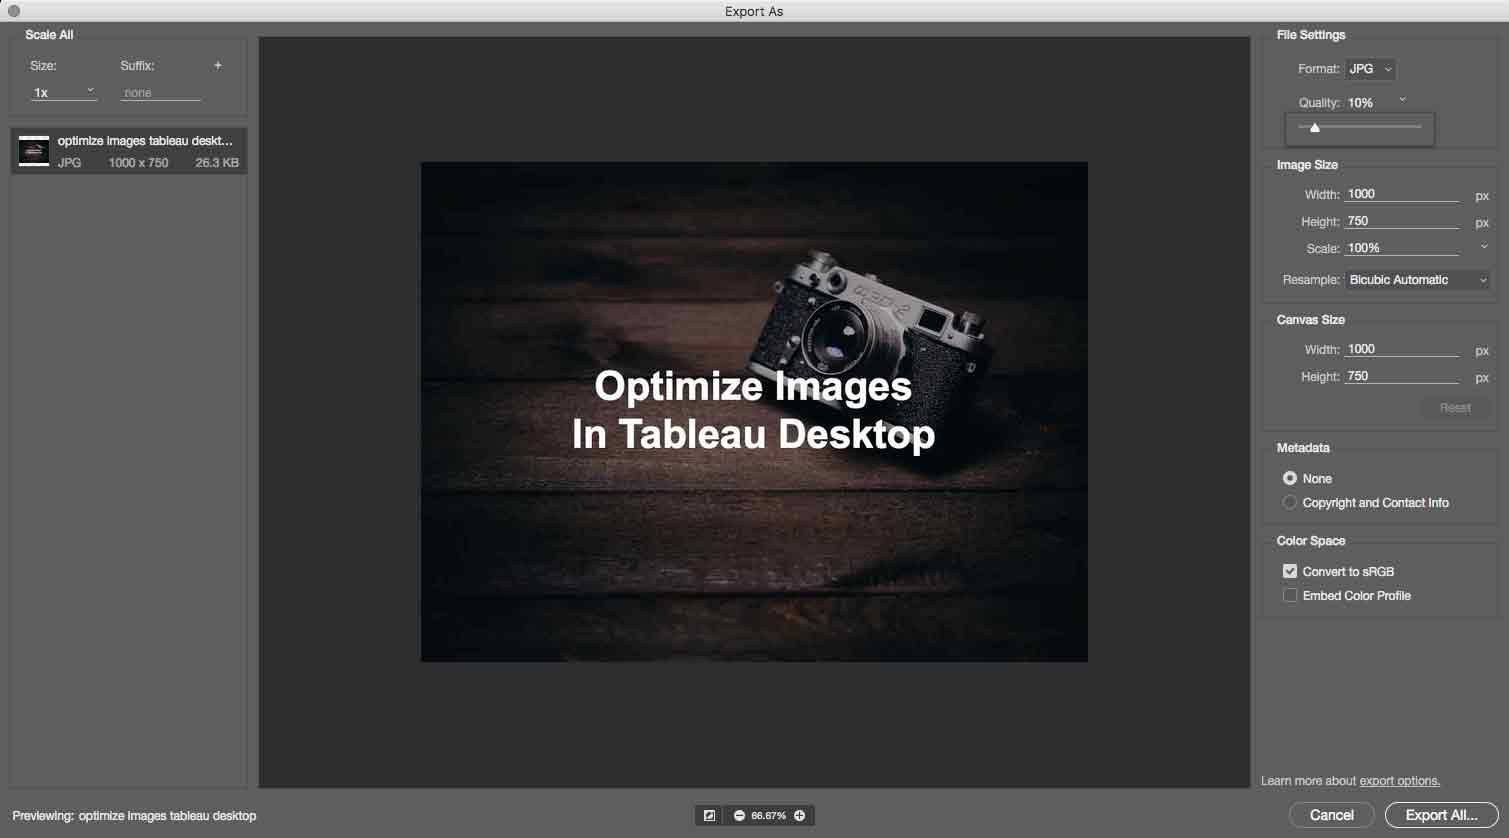
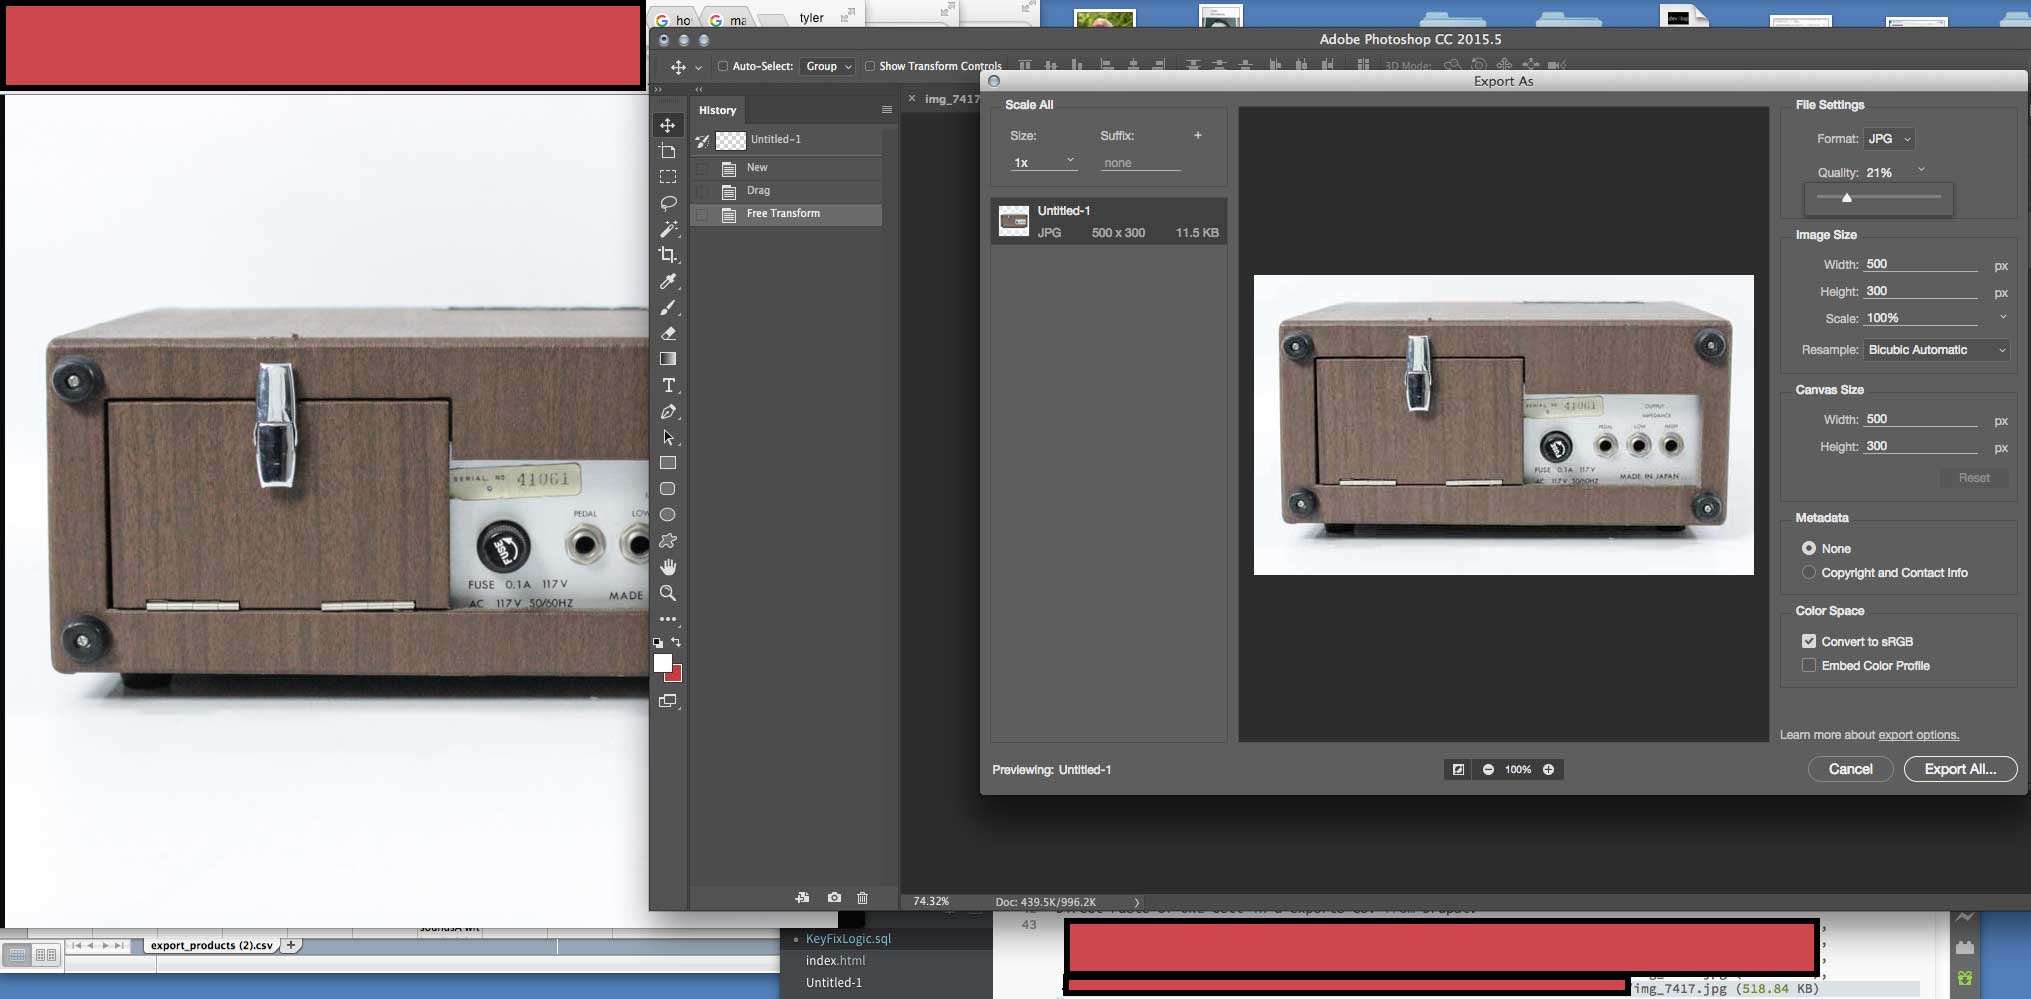
Before Tableau Server, have ground rules, bare minimums or maximums for image file sizes, similar to this image below, a stock image from pexels from years ago, edited in Photoshop, and optimized the image quality to ensure it’s not a large file on the frontend of my website.
Otherwise this web page would load slower, and cause the ranking to decrease.
Optimizing Images in Tableau Desktop is the true path to split second reporting and dashboards will load fast.
I recently optimized 2.9k image, that’s 3000 images, bulk automated optimization.. To help a local store e-commerce website. In an attempt to migrate and increase ranking.
We are transitioning from files that are 500kb to 1mb – down to sizes of <60kb. It helps reduce speeds of the dashboard if done correctly!!
The migration website was “so much better” the owner asked me to turn it off. The optimization of the images was recognized by the algorithm and it ranked better than their content.
Similar to rivalries in Tableau environments, the best dashboard gets the most clicks and those are often the dashboards that do not require a lot of waiting.
Learning Tableau desktop and Need to speed up your workbook?
Speeding up your workbook requires compressed images and optimized calculations.
So, ding ding, at the sound of the bell, let’s see who can optimize their photo the fastest!
Not familiar with Tableau Desktop – Learn about Tableau here!
Our Tableau Consulting team understands how important split second speed is with large vendors and small! Everyone wants split second speeds.
We consider workbooks like a website. We optimize every image to ensure the burden time is instant because our clients demand split-second response time – it’s 2017 for Chuck’s sake.
You heard me! How many workbooks do you think exists with un-optimized images today? That would be a fun project to scrape Tableau public, unzip each extract, open image folder, and check to see if the file size is >30kb.
That would be a fun project to scrape Tableau public, unzip each extract, open image folder, and check to see if the file size is >30kb.
We could aggregate what consultancies have the least optimized workbooks rather quickly.
These are micro wins, and Tableau desktop and server can handle your content without the extra work here. Optimizing images in tableau desktop is for customers who care about every aspect of speed, which is the majority of our current and previous work.
How does Dev3lop optimize images?
Pressing 4 buttons in photoshop you gain access to optimizing any image.
Photoshop is a great solution and there even compression apps on your phone that are 100% free.
Are you a consultant and have made hundreds of workbooks without optimizing images?
No big deal, you can automate images out of workbooks!
We use Photoshop, click the image to see a larger picture. Our client here has images around 500kb; we optimized it to 13kb.
Photoshop does cost money, you can google “image optimization” and free, you will find a ton of options!
Before we continue, here’s a few blogs that may interest you!
Four best practices or steps to optimize images in Tableau Desktop.
Optimize Images in Tableau Desktop – Like Rocky!
Do away with massive quality pictures, and optimize the image
Drop the ratio size if it’s massive, or your file will not be optimized
If you can’t tune it beyond 30kb – we prefer to find a better image – hero’s we look to stay under 100k.
Heroes are the big header image want to keep those from being pixelated, and people are more relaxed for those from a file size perspective.
Even little pictures need to scale down – we use photoshop!
A resized image is an unoptimized image
Optimizing Images Steps Explained
Optimize your image in Tableau with a color palette in mind! We use color palettes across every client engagement making awesome dashboards.
#1 Drop big quality pictures. They have free apps on the phone that optimize and compress image file sizes instantly or hire someone that uses photoshop for a living.
#2 If the file is bigger resolution than the dashboard, you’re asking your software to resize it for you, this is unnecessary – bring the file in at the appropriate canvas size.
#3 We may be biased here, but we do have a standard for production released content – we always peel back significant file sizes to avoid perpetually slow workbooks. Shaving off 1-second thousands of times a day is a big number.
#4 If you are resizing the image in Tableau Desktop, you should bring it in at that size to increase the speed of the workbook.
Your average enterprise website is <3mb per page. They never release images on their website before optimizing the file size. We prefer doing POC’s with whatever size and start optimizing the image in tableau desktop after everyone signs off on this being the right direction.
Just in case we want to swap pictures – we won’t lose a lot of work! Optimizing Images is Extremely Important, so put your gloves on!
Optimizing Images is Extremely Important, so put your gloves on!
Why are the images not being optimized for Tableau Desktop?
Optimizing is not on the forefront of product experts mind. Optimizing images in Tableau Desktop will help you in the long run. Do try to nudge your entire team to start making the content as lean as possible.
Alright, if you’ve read through our first MongoDB read through – also posted here on our site, hopefully, you understand MongoDB is not something to run away from. Rather, it’s just worded to capture their primary focus, which is developers or app developers.
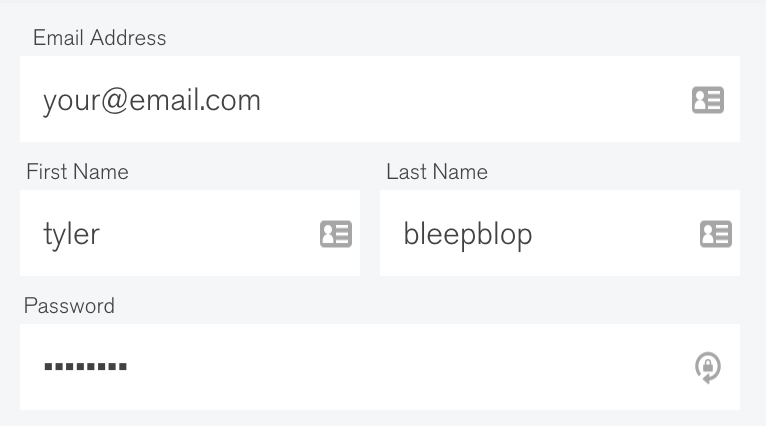
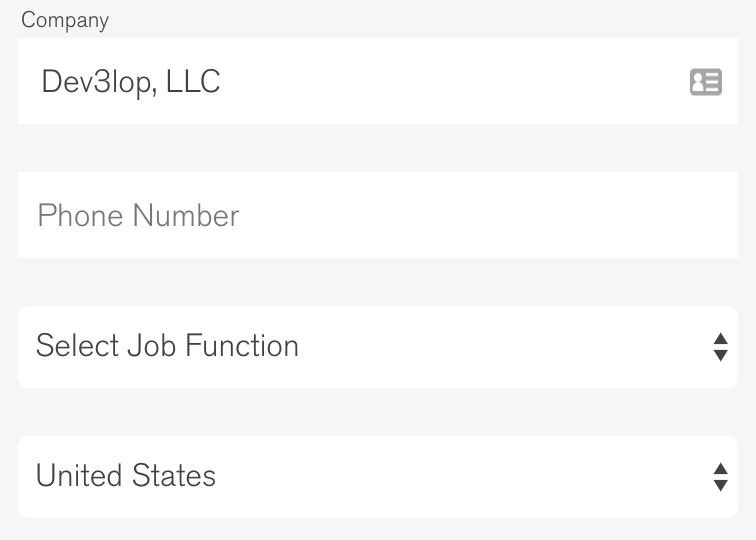
Get your correct email, first and last name on here. Don’t play funny with your development phase. Okay, maybe add someone else’s phone number because they will call you within 24hrs. I like to use an old managers phone number, but because I want to build a partnership with apps I use, I prefer using my real number!
Once you get this basic content filled in, you’re going to want to check the box of content you will likely never read. Terms of services — something you don’t read now, but if you’re looking to ‘really use this tech,’ it wouldn’t hurt scrolling through and understanding your limitations or expectations.
Cool, check that thing, and click Get started [for]Free.
The latest 2019.1 installer is similar to the installation below of 10.2! Not much has changed here since earlier days, either. Any version will work with this install guide.
Installing Tableau Desktop on Windows
Download Tableau Desktop.
Click the file to begin.
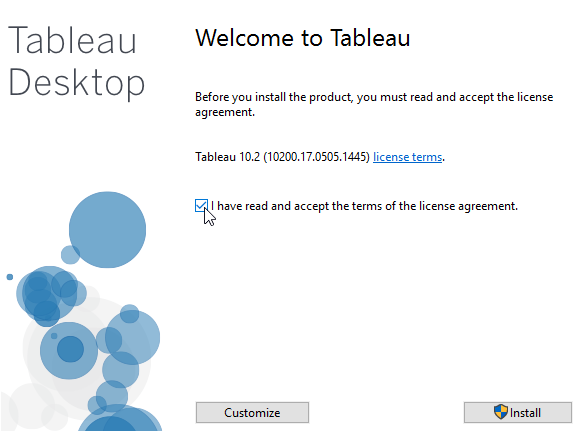
Agree to the terms.
Install.
Install Tableau Desktop Step: Left-click the checkbox to agree to the license agreement, then click install.
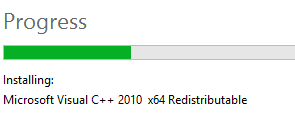
Click install, wait for the installation to finish, and this will only take a few minutes.
Install Tableau Desktop: The Progress bar shows Microsoft Visual C++ 2010 x64 Redistributable being installed.
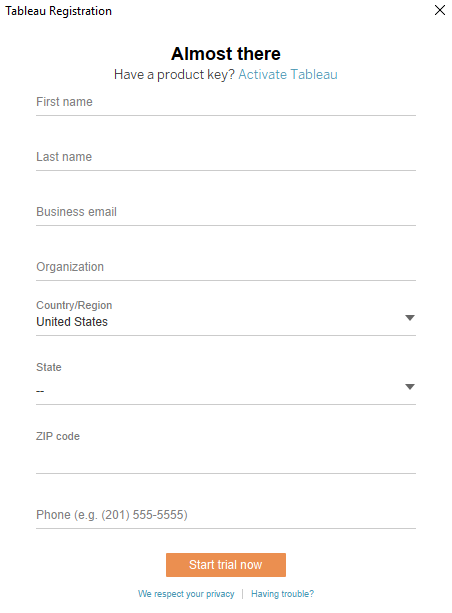
Type in registration info, first name, last name, email, organization, and geographic information.
Already have a key? Click ‘Activate Tableau’ if you already have your desktop key.
Type your Tableau Desktop Key ‘TDXX-XXXX-XXXX-XXXX’
Tableau Developer tip: TD means Tableau Desktop, TS means Tableau Server, be sure to use the TD license key for Tableau Desktop. If you see TS, ask your Tableau Consultant or Admin for the correct license!
You’re done!
Tableau Desktop installation is now complete!
Is the Tableau Desktop Installation Completed?
Suppose you’ve just completed installing Tableau Desktop or want to learn more; feel free to follow along on our other blog posts. Thanks!
We appreciate you checking out our how-to-install Tableau desktop tutorial.
Best Practices for Installation and Optimization
Tableau Desktop, a powerful data visualization and business intelligence tool, empowers organizations to turn raw data into actionable insights. Whether you’re a data analyst, a business professional, or an aspiring data wizard, Tableau Desktop can be your trusty companion in the journey to unlock the potential hidden within your data. However, harnessing its potential begins with the installation process, followed by a thorough understanding of best practices for optimal performance and productivity.
In this comprehensive guide, we will delve into the art of installing Tableau Desktop, emphasizing critical installation best practices and techniques that will set you on the path to success.
Chapter 1: Preparing for Installation
Before embarking on the Tableau Desktop installation journey, it’s paramount to establish a solid foundation, ensuring a smooth and successful deployment of this powerful data visualization and business intelligence tool. This chapter thoroughly explores the critical aspects of preparation, guiding you through the necessary steps to ensure that your Tableau Desktop installation is well-informed and optimized.
1.1 System Requirements: The Cornerstone of a Stable Environment
Tableau Desktop, a sophisticated and resource-intensive application, demands an environment that can accommodate its complexities and facilitate its seamless operation. Therefore, the initial step in your Tableau journey is to evaluate your hardware and software meticulously, validating that they meet or exceed Tableau’s specified system requirements.
Embarking on this journey without considering these prerequisites is akin to setting sail without a sturdy vessel. Inadequate system specifications can lead to many complications, ranging from sluggish performance, poor data governance controls, and frustrating crashes to outright installation errors. A comprehensive understanding of your system’s capabilities and Tableau’s demands is non-negotiable.
Take the time to delve into Tableau’s official documentation, where you’ll find a detailed exposition of the requisite system specifications. Consider processor speed, memory (RAM), disk space, and graphics capabilities. Moreover, don’t overlook the critical role that your operating system plays in this equation; ensure that your OS is compatible with Tableau Desktop’s requirements.
By meticulously scrutinizing and aligning your system with Tableau’s prerequisites, you set the stage for a robust and efficient installation. The systematic assessment of your hardware and software ensures that Tableau Desktop will operate at its full potential, unleashing the power of data analysis and visualization without hindrance.
1.2 License Considerations: The Key to Unlocking Full Potential
Tableau Desktop’s capabilities are vast, and to harness them to their full extent, a valid Tableau Desktop license key is an absolute necessity. This pivotal document grants you access to the myriad features and functions of Tableau Desktop, ensuring you can explore, analyze, and visualize your data with confidence and precision.
With various licensing options available, it’s imperative that you select the one that perfectly aligns with your specific needs and budget. Your choice will depend on factors such as the scale of your data analysis projects, the number of users requiring Tableau access, and the degree of collaboration your organization demands. Thus, before proceeding with the installation process, carefully deliberate on these factors to make the most informed selection.
Additionally, for those new to Tableau Desktop and who wish to explore its capabilities without immediate financial commitment, Tableau offers a generous 14-day free trial. This trial period is a golden opportunity to delve into Tableau’s features, experiment with data visualizations, and evaluate its potential to meet your organization’s objectives.
By being equipped with the appropriate license, you will ensure that your Tableau Desktop installation experience is legitimate and comprehensive, facilitating a seamless transition into data analysis and visualization.
In Conclusion
Preparation is the keystone of a successful Tableau Desktop installation. By meticulously evaluating your system’s compatibility and selecting the most suitable license option, you establish a robust and reliable foundation for your Tableau journey. Ensuring that your hardware and software are up to the task and acquiring the appropriate license sets the stage for a Tableau Desktop experience that is efficient, productive, and enriched with the full spectrum of data analysis and visualization capabilities.
Chapter 2: Installation Process – Navigating the Path to Data Discovery
Now that you have diligently prepared your system and taken care of license considerations, you’re well-equipped to embark on the exciting journey of installing Tableau Desktop. The installation process is a pivotal step in harnessing the potential of this powerful data visualization and business intelligence tool. This chapter will guide you through installing Tableau Desktop while emphasizing best practices for a smooth and optimized experience.
2.1 Downloading the Installer: Your Gateway to Tableau Desktop
The first step in the installation process involves acquiring the Tableau Desktop installer, your gateway to the world of data-driven insights. To do this, head to Tableau’s official website, where you’ll find a designated section for downloading the installer. Selecting the version that aligns with your specific operating system is imperative—Tableau Desktop is available for both Windows and macOS platforms.
Before downloading, ensure you have a stable and secure internet connection. The Tableau Desktop installer is a substantial file, and a reliable connection is essential to prevent interruptions during the download process. The integrity of the installer file is crucial to the subsequent steps, and disruption could potentially lead to corrupted files and installation errors.
2.2 Running the Installer: Navigating the On-Screen Odyssey
With the Tableau Desktop installer securely downloaded, it’s time to begin the installation process. Begin by locating the downloaded installer file and double-click on it. This simple action initiates the installation wizard, which will deftly guide you.
As you progress through the installation wizard, one of the critical steps is to read and comprehend the license agreement presented to you carefully. This agreement is the formal legal contract between you and Tableau, outlining the terms and conditions for using the software. Acceptance of this agreement is non-negotiable, as it is a prerequisite for proceeding with the installation.
Throughout the installation, you can select installation options, such as the installation path and preferred data sources. These custom installation options allow you to fine-tune Tableau Desktop to your specific needs, a practice highly recommended to optimize your experience with the software.
2.3 Custom Installation Options: Tailoring Tableau to Your Needs
Customization is a powerful tool during the installation process, enabling you to tailor Tableau Desktop to your specific requirements. These options become crucial for organizations and individuals with unique data analysis needs.
You can choose the installation path during installation, ensuring that Tableau Desktop is stored in the directory that aligns with your file management practices. This choice can impact future updates and maintenance, making it an essential consideration.
Additionally, you can specify your preferred data sources, streamlining the data connection process. You optimize efficiency and expedite data analysis by selecting relevant data sources for your projects.
Furthermore, consider any additional features or components that may enhance your Tableau experience. These could include specific connectors, drivers, or sample workbooks that align with your data sources or industry. Customizing your installation in this manner ensures that you are well-prepared to harness the full potential of Tableau Desktop.
In Conclusion
Installing Tableau Desktop is not merely a technical procedure; it’s the gateway to unlocking the power of data-driven decision-making. By meticulously downloading the installer, navigating the on-screen instructions, and taking full advantage of the custom installation options, you will lay a solid foundation for a productive and optimized Tableau Desktop experience. Your journey towards insightful data visualization and analysis begins with this installation process, setting the stage for your future success.
Chapter 3: Post-Installation Best Practices – Unleash the Full Potential of Tableau Desktop
Congratulations! With Tableau Desktop now successfully installed on your system, you’ve taken a significant step toward harnessing the immense power of data visualization and analysis. However, the installation is just the beginning of your Tableau journey. Post-installation setup and best practices are essential to maximize its capabilities and ensure an optimized experience. In this chapter, we will explore the critical aspects of post-installation, offering insights and guidance to set you on the path to data-driven success.
3.1 Activation and Registration: Unveil the Full Spectrum of Features
With Tableau Desktop installed, the first post-installation step is to activate and register your product. This pivotal process is critical to unlocking the full spectrum of features and capabilities Tableau Desktop offers.
Activate your Tableau Desktop using the valid license key that you ensured you had during the pre-installation phase. Activation validates your software and grants you full access to the array of features Tableau has to offer. It’s a crucial step for both new users and experienced Tableau enthusiasts.
Once activated, don’t overlook the importance of registering your product. Registration validates your Tableau Desktop and entitles you to software updates and support from Tableau. Staying up-to-date with the latest features and improvements is vital to ensure you’re equipped with the most advanced data analysis and visualization tools.
3.2 Data Sources and Data Preparation: The Foundation of Analysis
One of Tableau’s distinguishing strengths lies in its ability to connect seamlessly with diverse data sources, from databases to spreadsheets and cloud services. To optimize your Tableau Desktop installation, it’s essential to configure data connections to your preferred sources and prepare your data for analysis. This foundational step will significantly enhance your analysis experience.
When configuring data connections, ensure you set up connections to the most relevant and up-to-date data sources. This practice minimizes data latency, providing accurate and timely information you analyze. Additionally, consider data cleaning, structuring, and indexing to speed up the analysis process. Clean data prevents inaccuracies and enhances the precision of your visualizations, while structured and indexed data accelerates data retrieval and analysis.
To attain peak performance and efficiency with Tableau Desktop, consider implementing the following best practices:
Adjust caching settings for faster data retrieval: Caching frequently used data can significantly speed up the analysis process. Configure your caching settings to ensure the most relevant data is available for analysis.
Manage extract refresh schedules based on data volatility: If you are working with data that changes frequently, consider adjusting the extract refresh schedules to align with the data’s volatility. This ensures that your data remains up-to-date without excessive refreshes.
Utilize data source filters to limit retrieval: Data source filters are powerful tools to refine your queries. Implement them judiciously to restrict the amount of data retrieved, optimizing performance.
Regularly clean and optimize your workbooks and dashboards: Periodically review and refine them to ensure they remain efficient and effective. Remove unnecessary elements and streamline your visualizations to enhance user experience.
3.4 Security Measures: Safeguarding Your Data
Data security is a paramount concern, and Tableau Desktop offers robust security options to protect your data assets. Implementing security best practices is essential to safeguard sensitive information and maintain data integrity. Some critical security measures include:
Encryption: Leverage encryption features to secure data during transmission and storage. Encryption ensures that your data remains confidential and protected from unauthorized access.
Permissions settings: Utilize permissions settings to define who can access and manipulate your data and dashboards. Restrict data access to only those who require it, ensuring that sensitive information remains secure.
Implementing robust security measures is fundamental to post-installation best practices, ensuring that your data assets remain confidential, protected, and accessible only to authorized personnel.
In Conclusion
Post-installation best practices bridge the Tableau Desktop installation and your journey into the world of data-driven insights. By activating and registering your product, configuring data connections, optimizing performance, and implementing robust security measures, you set the stage for an optimized Tableau experience. In this post-installation phase, you refine your setup, ensuring you are fully equipped to explore, analyze, and visualize data with confidence, precision, and the utmost security. Your Tableau journey is now poised for success.