by tyler garrett | Jan 20, 2023 | Automation, Business
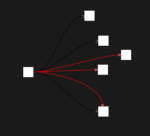
Building a tooling chain to help diagnose operational issues and address high-priority issues as they arise is crucial for ensuring the smooth operation of any system. In this article, we will discuss the steps that you can take to build a tooling chain that can help you quickly identify and resolve issues as they arise.
- Identifying the tools you need
The first step in building a tooling chain is to identify the tools that you will need. This will depend on the specific requirements of your system, but some common tools that are used for diagnosing operational issues include:
- Monitoring tools: These tools can be used to track the performance of your system and to identify any issues that may be occurring.
- Logging tools: These tools can be used to collect and analyze log data from your system, which can be used to identify and troubleshoot issues.
- Performance analysis tools: These tools can be used to analyze the performance of your system, which can be used to identify bottlenecks and other issues.
- Integrating the tools
Once you have identified the tools that you will need, the next step is to integrate them into a cohesive tooling chain. This will involve setting up the tools so that they can work together and share data, as well as configuring them so that they can be used effectively.
- Building an alerting system
An important part of building a tooling chain is building an alerting system. This will involve setting up the tools so that they can send alerts when specific conditions are met. For example, you may set up an alert to be sent when the system’s CPU usage exceeds a certain threshold.
- Establishing a triage process
Once you have built your tooling chain, it’s important to establish a triage process. This will involve setting up a process for identifying, prioritizing, and resolving issues as they arise. This will typically involve creating a set of procedures for identifying and resolving issues, as well as creating a team that is responsible for managing the triage process.
- Continuously monitoring and improving
Finally, it’s important to continuously monitor and improve your tooling chain. This will involve analyzing the performance of the tools and the triage process, and looking for areas where improvements can be made. Additionally, it’s important to keep the tools up to date and to ensure that they are configured correctly.
In conclusion, building a tooling chain to help diagnose operational issues and address high-priority issues as they arise is crucial for ensuring the smooth operation of any system. By identifying the tools that you will need, integrating them into a cohesive tooling chain, building an alerting system, establishing a triage process, and continuously monitoring and improving your tooling chain, you can ensure that your system is able to quickly identify and resolve issues as they arise.

by tyler garrett | Jan 20, 2023 | Automation, Databasehelp
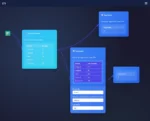
Designing, improving, and automating processes like database provision, schema migration, and capacity planning can be a challenging task, but with the right approach, it can be made much simpler. In this article, we will explore some best practices and tools that can help you design, improve, and automate these processes.
- Designing processes
The first step in designing processes is to understand the requirements of the system. This includes understanding the data that will be stored, the number of users, and the expected load on the system. Once you have a good understanding of the requirements, you can start designing the processes.
It’s important to keep in mind that the processes should be designed to be as simple and efficient as possible. This means that they should be easy to understand and maintain, and they should be designed to minimize the number of steps required to complete a task.
- Improving processes
Once the processes have been designed, it’s important to continuously monitor and improve them. This can be done by analyzing the performance of the system and looking for areas where improvements can be made. Common areas for improvement include reducing the number of steps required to complete a task, optimizing the performance of the system, and reducing the amount of manual work required.
- Automating processes
Automating processes can significantly improve the efficiency and reliability of your system. This can be done by using tools like configuration management tools, which can be used to automate the provisioning and configuration of your system. Additionally, you can use tools like database migration tools, which can be used to automate the process of migrating data between different database systems.
- Capacity Planning
Capacity planning is an important step in ensuring that your system is able to handle the expected load. This involves determining the amount of resources required to support the system, and then scaling the system accordingly. This can be done by monitoring the performance of the system, and then making adjustments as needed.
In conclusion, designing, improving, and automating processes like database provision, schema migration, and capacity planning can be a challenging task, but with the right approach, it can be made much simpler. By understanding the requirements of the system, designing simple and efficient processes, continuously monitoring and improving the processes, and automating the processes, you can ensure that your system is able to handle the expected load and provide a high level of performance.

by tyler garrett | Jan 20, 2023 | Solutions
Here’s a polished rewrite of the piece with a more modern, consulting-savvy tone, built for blog or LinkedIn visibility—and a few links to dev3lop.com added in naturally to align with your offerings:
The Finance Industry’s Over-Reliance on Data: The Risks and Drawbacks
In today’s finance world, data is king. From algorithmic trading and credit risk modeling to customer segmentation and fraud detection, data-driven strategies have become the norm. But as the industry races to automate, quantify, and optimize, it risks leaning too far into the data pool—and drowning in unintended consequences.
At DEV3LOP, we help businesses strike a healthy balance between data automation and human insight. And in the finance space, that balance is more crucial than ever.
The Hidden Dangers of Biased Data
The finance industry’s love for data often masks a serious issue: bias. Much of the data being used is self-reported, outdated, or pulled from limited sources, creating blind spots in analysis. As a result, decision-making skews toward reinforcing past patterns rather than adapting to changing market realities or underserved demographics.
Without proper data audits or a strategy to ensure diverse inputs, financial institutions risk building tools and processes that serve the few—while alienating the many. This is why we recommend regular data quality assessments and architecture reviews as part of any analytics strategy.
Over-Automation Undermines Accountability
From robo-advisors to loan approval algorithms, automation is everywhere. But when you replace too much human oversight with machines, things go wrong—quietly and at scale.
Automated systems can deny loans, flag transactions, or misjudge creditworthiness based on flawed logic or outdated models. Worse, they often lack transparency. Customers and regulators are left in the dark, unable to understand why a decision was made. At DEV3, we advocate for hybrid systems—automated where it helps, but always layered with explain-ability and human review.
Innovation Takes a Backseat
Chasing yesterday’s KPIs can stall tomorrow’s progress. A hyper-focus on metrics and historical trends can trap teams in a feedback loop of incremental optimization instead of bold innovation.
Many financial organizations struggle to evolve beyond what’s measurable, ignoring qualitative insights, customer empathy, and market intuition. That’s where data consultants can play a key role—unlocking creative solutions that aren’t confined to dashboards and spreadsheets.
The Cost of Keeping Up
Data isn’t cheap. Between storage infrastructure, security protocols, machine learning tools, and full-time data science teams, even mid-size firms can find themselves buried in technical debt.
Smaller players in the financial sector face an uphill battle just to participate. And when data becomes a barrier instead of an advantage, it’s time to reassess your stack. At DEV3LOP, we’ve helped firms trim unnecessary tools, simplify pipelines, and find scalable alternatives to bloated platforms.
Privacy and Trust Are on the Line
As the industry continues to harvest and analyze personal financial behavior, trust hangs in the balance. Data breaches, misuse of personal information, and the creep factor of overly personalized insights can quickly damage brand reputation.
In a post-GDPR, privacy-first world, data ethics are no longer optional—they’re strategic. Transparency in how data is collected, processed, and applied is essential, and your systems need to be designed with accountability at their core.
The Bottom Line
Data is powerful, but it’s not a silver bullet. Over-reliance on it—especially without governance, context, or critical thinking—can introduce risk, erode trust, and stall innovation. The financial services industry needs to rethink the role of data: not as the driver, but as the co-pilot.
Need help building a smarter, more balanced approach to data strategy in finance? Let’s talk.

by tyler garrett | Jan 19, 2023 | DataScienceFTW
Data science is a rapidly growing field that has seen a significant increase in demand in recent years. With the rise of big data and the increasing need for businesses to make data-driven decisions, data scientists have become essential to organizations of all sizes and industries. However, the role of data scientists is not static and will continue to evolve in the coming years.
One of the main ways in which the role of data scientists will evolve is through the increasing use of artificial intelligence and machine learning. As these technologies become more advanced and more accessible, data scientists will be expected to have a deeper understanding of them and to use them to analyze and interpret data in new and more powerful ways. This could include using machine learning algorithms to identify patterns and insights in large data sets, or using natural language processing techniques to analyze unstructured data such as text and speech.
Another important trend that will shape the role of data scientists is the growing importance of data ethics. As data becomes an increasingly valuable asset, organizations will need to ensure that they are using it responsibly and ethically. Data scientists will be expected to understand the ethical implications of their work and to help organizations navigate the complex legal and regulatory landscape surrounding data.
The rise of the Internet of Things (IoT) and the growing amount of data generated by connected devices will also play a significant role in the evolution of the data scientist role. As data from IoT devices becomes more prevalent, data scientists will be responsible for analyzing and making sense of this data in order to extract insights and inform business decisions.
Finally, the role of data scientists will evolve as organizations continue to realize the value of data-driven decision making. Data scientists will be increasingly relied upon to provide insights and recommendations that can inform strategic business decisions. This will require data scientists to have a deep understanding of the business and to be able to communicate the insights they discover in a way that is accessible to non-technical stakeholders.
In conclusion, the role of data scientists is constantly evolving and will continue to do so in the future. Data scientists will be expected to have a broad range of skills including machine learning, data ethics, IoT and the ability to communicate complex insights to non-technical audiences. Organizations that are able to attract and retain data scientists with these skills will be well-positioned to take advantage of the opportunities presented by big data and the increasing importance of data-driven decision making.

by tyler garrett | Jan 18, 2023 | Reporting
Creating interactive dashboards in Tableau is a powerful way to communicate complex data sets in an easy-to-understand way. Tableau is a popular tool for creating interactive dashboards because of its powerful visualization capabilities and ease of use. We started a tableau services business many years ago and we hope writing more interactive dashboards in tableau, we will help more end users adopt the solutions you are engineering, supporting, or managing. The process of creating interactive dashboards in Tableau includes several key steps and best practices that will help you create effective and engaging visualizations.
The first step in creating an interactive dashboard in Tableau is to connect to your data. Tableau supports a wide variety of data sources, including Excel, CSV, and SQL databases. Once your data is connected, you can begin designing your dashboard layout. Tableau allows you to arrange visualizations and other elements on the dashboard using a drag-and-drop interface. It’s important to consider the overall layout and organization of your dashboard, as well as the size and placement of individual visualizations.
One of the key features of interactive dashboards is the ability to filter and interact with the data. Tableau allows you to add filters and actions to your visualizations, which allow your audience to explore the data in more depth. Filters allow your audience to refine the data that is displayed, while actions allow your audience to navigate between different visualizations and pages.
Another advanced feature of Tableau is the ability to create calculated fields and groups. Calculated fields allow you to perform advanced calculations and data manipulations directly in Tableau, without the need for external data processing tools. Groups allow you to combine similar data points into a single category, which can help to simplify your visualizations.
Once your dashboard is complete, you can share it with others by publishing it to Tableau Server or Tableau Public. This allows other people to access your dashboard and interact with the data. You can also export your dashboard as an image or PDF for distribution via email or other means.
When creating interactive dashboards in Tableau, it’s important to keep it simple, make it interactive, make it visually appealing, test and iterate, and keep it up to date. Avoid cluttering your dashboard with too much information and instead focus on the key insights and data points that you want to communicate. Allow your audience to explore the data in more depth by adding filters, actions, and other interactive elements. Use colors, font, and other formatting options to make your visualizations more engaging and easy to understand. Test your dashboard with different audiences and make adjustments as needed. And schedule automatic updates or refresh the data regularly to ensure that the dashboard always reflects the most current information.
Breaking down 5 steps to improve your creativity when creating Tableau desktop dashboards
- Connect to your data: The first step in creating an interactive dashboard in Tableau is to connect to your data. Tableau supports a wide variety of data sources, including Excel, CSV, and SQL databases. To connect to your data, simply click on the “Connect” button in the top-left corner of the Tableau interface and select the appropriate data source.
- Design your dashboard layout: Once your data is connected, you can begin designing your dashboard layout. Tableau allows you to arrange visualizations and other elements on the dashboard using a drag-and-drop interface. It’s important to consider the overall layout and organization of your dashboard, as well as the size and placement of individual visualizations.
- Add filters and actions: One of the key features of interactive dashboards is the ability to filter and interact with the data. Tableau allows you to add filters and actions to your visualizations, which allow your audience to explore the data in more depth. Filters allow your audience to refine the data that is displayed, while actions allow your audience to navigate between different visualizations and pages.
- Create calculated fields and groups: Another advanced feature of Tableau is the ability to create calculated fields and groups. Calculated fields allow you to perform advanced calculations and data manipulations directly in Tableau, without the need for external data processing tools. Groups allow you to combine similar data points into a single category, which can help to simplify your visualizations.
- Share and publish your dashboard: Once your dashboard is complete, you can share it with others by publishing it to Tableau Server or Tableau Public. This allows other people to access your dashboard and interact with the data. You can also export your dashboard as an image or PDF for distribution via email or other means.