Part-of-speech tagging, also known as POS tagging or grammatical tagging, is a method of annotating words in a text with their corresponding grammatical categories, such as noun, verb, adjective, adverb, and sometimes this is referred to as data mining. This process is important for natural language processing (NLP) tasks such as text classification, machine translation, and information retrieval.
There are two main approaches to POS tagging: rule-based and statistical. Rule-based tagging uses a set of hand-written rules to assign POS tags to words, while statistical tagging uses machine learning algorithms to learn the POS tag of a word based on its context.
Statistical POS tagging is more accurate and widely used because it can take into account the context in which a word is used and learn from a large corpus of annotated text. The most common machine learning algorithm used for POS tagging is the Hidden Markov Model (HMM), which uses a set of states and transition probabilities to predict the POS tag of a word.
One of the most popular POS tagging tools is the Natural Language Toolkit (NLTK) library in Python, which provides a set of functions for tokenizing, POS tagging, and parsing text. NLTK also includes a pre-trained POS tagger based on the Penn Treebank POS tag set, which is a widely used standard for POS tagging.
In addition to NLTK, other popular POS tagging tools include the Stanford POS Tagger, the OpenNLP POS Tagger, and the spaCy library.
POS tagging is an important step in many NLP tasks, and it is used as a pre-processing step for other NLP tasks such as named entity recognition, sentiment analysis, and text summarization. It is a crucial step in understanding the meaning of text, as the POS tags provide important information about the syntactic structure of a sentence.
In conclusion, Part-of-Speech tagging is a technique that assigns grammatical category to words in a text, which is important for natural language processing tasks. Statistical approach is more accurate and widely used, and there are several libraries and tools available to perform POS tagging. It serves as a pre-processing step for other NLP tasks and it is crucial in understanding the meaning of text.
Using NLTK for the First Time
Here’s a quick walkthrough to allow you to begin POS tagging.
If you have pycharm available or a python IDE, begin by opening the terminal and running.
pip install nltk
Next you want to use their downloader.
Here’s the python to run next. It will open their downloader on your computer.
import nltk
nltk.download()
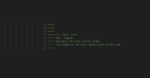
The following window will open.
Go ahead and download everything.
Here is an example of a Python script that uses the Natural Language Toolkit (NLTK) library to perform part-of-speech tagging on the text scraped from a website:
Find the code from the youtube video above, here on github, explained line by line below.
import requests
from bs4 import BeautifulSoup
import nltk

# Work-around for mod security, simulates you being a real user

headers = {
    'User-Agent': 'Mozilla/5.0 (Macintosh; Intel Mac OS X 10.12; rv:55.0) Gecko/20100101 Firefox/55.0',
}

# Scrape the website's HTML
url = "https://dev3lop.com"
page = requests.get(url,  headers=headers)
soup = BeautifulSoup(page.content, "html.parser")

# Extract the text from the website
text = soup.get_text()

# Tokenize the text
tokens = nltk.word_tokenize(text)

# Perform part-of-speech tagging on the tokens
tagged_tokens = nltk.pos_tag(tokens)

# Print the tagged tokens
print(tagged_tokens)
This script uses the requests library to scrape the HTML of the website specified in the url variable. It then uses the BeautifulSoup library to extract the text from the HTML. The text is tokenized using the word_tokenize() function from NLTK, and then part-of-speech tagging is performed on the tokens using the pos_tag() function. The resulting list of tagged tokens is then printed to the console.
Filtering out common words
If you’re digging deeper, you may want to see what “NN” for nouns, “VB” for verbs, and “JJ” for adjectives are in usage.
We can quickly filter out the POS tags that are not useful for our analysis, such as punctuation marks or common function words like “is” or “the”. For example, you can use a list comprehension to filter out the POS tags that are not in a certain list of POS tags that you are interested in analyzing:
# List of POS tags to include in the analysis
include_pos = ["NN", "VB", "JJ"]

# Filter the tagged tokens to include only the specified POS tags
filtered_tokens = [(token, pos) for token, pos in tagged_tokens if pos in include_pos]

# Print the filtered tokens
print(filtered_tokens)
Now that you’re done counting occurrences, you can inspect the print of token_counts and notice this method also helped you sort the information from largest to smallest. We hope this lesson on Part-of-Speech Tagging using a Web Scrapped Website is a solution you’re able to take into consideration when generating your next python data pipeline!
If you need assistance creating these tools, you can count on our data engineering consulting services to help elevate your python engineering needs!
Welcome to the world of data warehousing! Data warehousing is a process of organizing and storing data in a way that allows for efficient querying and analysis. It is typically used to support business intelligence and decision-making activities. Our company offers data warehousing services to businesses and we hope by creating a quick beginners guide you may begin to start understanding more about data warehousing practices from a high view.
If you’re new to data warehousing, here is a beginner’s guide to get you started:
Identify the business requirements for your data warehouse. Before you begin building your data warehouse, it’s important to understand the types of questions that it will be used to answer, and the types of data that will be needed to answer those questions. This will help you determine the structure and organization of your data warehouse.
Design the data warehouse schema. The schema is the blueprint for your data warehouse, defining the tables and relationships between those tables. It’s important to design a schema that is flexible enough to support your current and future business needs, while also being efficient and easy to use.
Extract, transform, and load (ETL) the data into the data warehouse. ETL involves extracting data from various sources, transforming it into the format required by the data warehouse, and loading it into the data warehouse tables. This process can be time-consuming and requires careful planning and attention to detail.
Use SQL or a business intelligence tool to query and analyze the data in the data warehouse. Once your data warehouse is set up and populated with data, you can use SQL or a business intelligence tool such as Tableau or Power BI to explore and visualize the data. This will allow you to gain insights and make informed decisions based on the data.
Regularly update and maintain the data warehouse. It’s important to regularly refresh the data in your data warehouse with new information, and to ensure that the data is accurate and up-to-date. You may also need to fix any issues that arise, such as data errors or performance issues.
By following these steps, you can set up and maintain a successful data warehouse that supports your business intelligence and decision-making needs. Happy data warehousing!
The auth0 api helps you send data VIA code to other data sources. This makes tableau, powerbi, and other dashboarding tools more possible.
While creating canopys.io, we found auth0 a great tool for generating access without having to build the access layer, but without using the auth0 api, we will never see our data without logging in and manually clicking.
To avoid manually processes to retrieve your auth0 data, here’s example code that demonstrates how to start using the Auth0 API and send data to Google BigQuery:
First, you will need to install the required libraries. For the Auth0 API, you will need the auth0 library. For Google BigQuery, you will need the google-auth and google-api-python-client libraries. You can install these libraries using pip:
Next, you will need to obtain your Auth0 API credentials and your Google BigQuery credentials. To get your Auth0 API credentials, you will need to create an Auth0 account and an API. You can find detailed instructions for doing this in the Auth0 documentation. To get your Google BigQuery credentials, you will need to create a Google Cloud Platform account and a project with the BigQuery API enabled. You can find detailed instructions for doing this in the Google Cloud Platform documentation.
Once you have your credentials, you can use the following code to authenticate with the Auth0 API and send data to Google BigQuery:
# Import the necessary libraries
import auth0
import google.auth
from google.auth.transport.requests import Request
from googleapiclient.discovery import build

# Set your Auth0 API credentials
auth0_client_id = 'YOUR_AUTH0_CLIENT_ID'
auth0_client_secret = 'YOUR_AUTH0_CLIENT_SECRET'
auth0_domain = 'YOUR_AUTH0_DOMAIN'

# Set your Google BigQuery credentials
google_credentials = google.auth.credentials.Credentials.from_service_account_info({
  "type": "service_account",
  "project_id": "YOUR_GOOGLE_PROJECT_ID",
  "private_key_id": "YOUR_GOOGLE_PRIVATE_KEY_ID",
  "private_key": "YOUR_GOOGLE_PRIVATE_KEY",
  "client_email": "YOUR_GOOGLE_CLIENT_EMAIL",
  "client_id": "YOUR_GOOGLE_CLIENT_ID",
  "auth_uri": "https://accounts.google.com/o/oauth2/auth",
  "token_uri": "https://oauth2.googleapis.com/token",
  "auth_provider_x509_cert_url": "https://www.googleapis.com/oauth2/v1/certs",
  "client_x509_cert_url": "YOUR_GOOGLE_CLIENT_CERT_URL"
})

# Authenticate with the Auth0 API
auth0_api_client = auth0.ManagementApi(auth0_client_id, auth0_client_secret, domain=auth0_domain)

# Send data to Google BigQuery
bigquery_service = build('bigquery', 'v2', credentials=google_credentials)
Now that you know more about auth0 api to GoogleBigquery, you can start managing your data warehousing efforts here, and unlock your business data potential.
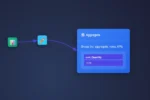
To write Node.js code that uses the Sage API to transfer data to Google BigQuery, you will need to use the Google Cloud Client Libraries for Node.js and the Sage API client for Node.js.
First, you will need to set up your environment by installing the necessary libraries and authenticating your Google Cloud account. You can do this by following the instructions in the Google Cloud documentation: https://cloud.google.com/docs/authentication/getting-started
Once you have set up your environment, you can use the following code as a starting point for transferring data from Sage to BigQuery:
Copy codeconst { BigQuery } = require('@google-cloud/bigquery');
const SageAPI = require('sage-api-client');

// Create a client for interacting with BigQuery
const bigquery = new BigQuery();

// Create a client for interacting with the Sage API
const sage = new SageAPI({
  // Add your Sage API credentials here
});

// Connect to the Sage API and retrieve data
sage.get('/api/v2/products').then(response => {
  // Format the data for insertion into BigQuery
  const data = response.data.map(product => ({
    id: product.id,
    name: product.name,
    price: product.price,
  }));

  // Insert the data into a BigQuery table
  bigquery
    .dataset('my_dataset')
    .table('my_table')
    .insert(data)
    .then(() => {
      console.log('Data inserted into BigQuery table');
    })
    .catch(err => {
      console.error('Error inserting data into BigQuery table:', err);
    });
});
This code creates a client for interacting with the Sage API and a client for interacting with BigQuery. It then retrieves data from the Sage API, formats it for insertion into BigQuery, and inserts it into a BigQuery table. You will need to replace my_dataset and my_table with the names of your dataset and table, and add your Sage API credentials to the SageAPI constructor.
This line imports the BigQuery class from the @google-cloud/bigquery library. The BigQuery class provides a client for interacting with the Big Query API.
async function sendTikTokDataToBigQuery(data) {
  // Create a client for interacting with the BigQuery API
  const bigquery = new BigQuery();
This function defines the sendTikTokDataToBigQuery function, which takes an array of data as an argument. The function begins by creating a new BigQuery client object.
// The name for the new dataset
  const datasetName = 'tiktok_data';

  // The name for the new table
  const tableName = 'tiktok_table';
These lines define the names of the new dataset and table that will be created in Big Query.
This defines the schema for the new table as an array of objects, with each object representing a column in the table and specifying the name and data type of the column.
// Create a new dataset
await bigquery.createDataset(datasetName);
This line creates a new dataset in Big Query using the createDataset method of the bigquery client and the datasetName variable.
// Create a new table in the dataset
await bigquery.dataset(datasetName).createTable(tableName, { schema: schema });
This line creates a new table in the dataset using the createTable method of the bigquery.dataset object and the tableName and schema variables.
// Insert the data into the table
await bigquery
.dataset(datasetName)
.table(tableName)
.insert(data);
This line inserts the data into the table using the insert method of the bigquery.dataset.table object and the data argument.
console.log(`Successfully sent TikTok data to Big Query: ${datasetName}.${tableName}`);
}
This logs a message indicating that the data has been successfully sent to Big Query.
This code defines an array of TikTok data objects and then calls the sendTikTokDataToBigQuery function with this array as an argument. This will send the TikTok data to BigQuery.
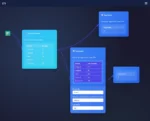
The complete code to send TikTok data to Google Big Query using Node.js:
const { BigQuery } = require('@google-cloud/bigquery');
async function sendTikTokDataToBigQuery(data) {
// Create a client for interacting with the BigQuery API
const bigquery = new BigQuery();
// The name for the new dataset
const datasetName = 'tiktok_data';
// The name for the new table
const tableName = 'tiktok_table';
// The schema for the new table
  const schema = [
    { name: 'id', type: 'INTEGER' },
    { name: 'username', type: 'STRING' },
    { name: 'description', type: 'STRING' },
    { name: 'likes', type: 'INTEGER' },
    { name: 'comments', type: 'INTEGER' }
  ];
// Create a new dataset
  await bigquery.createDataset(datasetName);
// Create a new table in the dataset
  await bigquery.dataset(datasetName).createTable(tableName, { schema: schema });
// Insert the data into the table
  await bigquery
    .dataset(datasetName)
    .table(tableName)
    .insert(data);
console.log(`Successfully sent TikTok data to Big Query: ${datasetName}.${tableName}`);
}
// Example usage: send TikTok data to Big Query
const data = [
  { id: 1, username: 'tiktokuser1', description: 'My first TikTok video', likes: 1000, comments: 50 },
  { id: 2, username: 'tiktokuser2', description: 'My second TikTok video', likes: 2000, comments: 100 },
  { id: 3, username: 'tiktokuser3', description: 'My third TikTok video', likes: 3000, comments: 150 }
];
sendTikTokDataToBigQuery(data);
This code creates a new Big Query dataset and table, and then inserts the TikTok data into the table. The schema for the table is defined as an array of objects, with each object representing a column in the table and specifying the name and data type of the column.
You will need to have the Google Cloud Big Query Node.js client library installed, which you can do by running npm install @google-cloud/bigquery in your project directory.
You will also need to have the necessary credentials for authenticating with the Big Query API. You can set up a service account and download the JSON key file from the Google Cloud Console, and then set the GOOGLE_APPLICATION_CREDENTIALS environment variable to the path of the JSON key file.