Let’s create a Schema in your MySQL Workbench on Mac OS.
Welcome to a quick and user-friendly guide to generating your first schema in MySQL.
By the end of this blog, you will understand how to generate a MySQL schema.
A schema is necessary for importing CSV files or JSON files because our end objective is uploading CSVs and performing custom SQL, and pushing that content into Tableau Desktop.
Our following blogs will help you with importing a CSV into MySQL on your Mac OS.
Firstly we are going to want to understand the verbiage used in the product and the difference between database and schemas.
After you’ve downloaded MySQL workbench – we will want to begin bringing in data for Tableau consumption.
MySQL has Schemas in the database!
I’m sure you’re familiar with what a database is, if not, here’s the definition.
A database is a structured set of data held in a computer, especially one that is accessible in various ways.
In the MySQL – you can build multiple ‘folders’ in your database, called schemas.
Schema VS Database
A database is your primary container; it contains the data and log files, and all the schemas within it.
You always back up a database; it is a discrete unit on its own.
Schemas are like folders within a database and are mainly used to group logical objects together, which leads to ease of setting permissions by the schema.
Creating a Schema in MySQL Mac OS
Let’s talk about the point and click methods first.
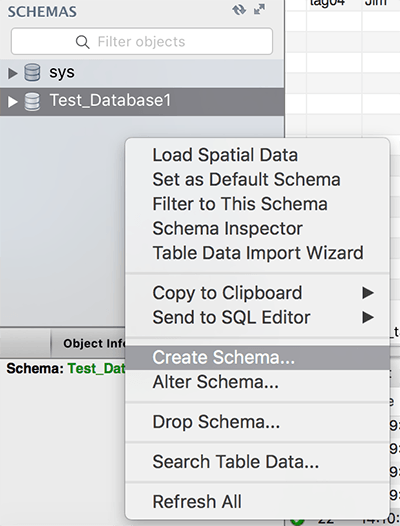
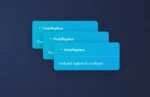
When you have your workbench open – you’ll notice a place on the bottom left labeled “SCHEMAS,” and that’s where we want to click right to build a new Test Database!
Creating your first schema on your Mac OS MySQL.
Setting up your MySQL Schema on your Mac
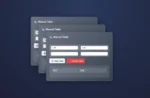
Let’s start setting up your MySQL Schema.
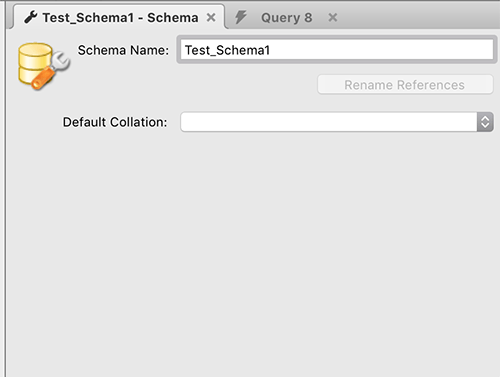
Name your MySQL schema “Test_Schema1.”
After you right click to create your schema – rename your MySQL schema.
The encoding is defined by the Unicode standard and was initially designed by Ken Thompson and Rob Pike.
The name is derived from Unicode (or Universal Coded Character Set) Transformation Format – 8-bit.
We will use UTF-8 for this schema.
MySQL refers to UTF8 as a common choice. For our needs – let’s use the UTF8 default.
Click apply – which is on the bottom right of the screen.
Left click to apply.
Wrapping up your schema build in Mac OS MySQL Workbench
Let’s wrap up your schema creation in MySQL.
If you’ve followed along you will see this window.
MySQL generates SQL, shows it to you, and maybe that’s easier for you in the future?
This leads us to our next topic.
Using SQL – instead of the GUI!
Using SQL to generate a Schema in your Mac OS on MySQL Workbench
Using SQL is an alternative to the clicks we just gained your first schema. Woot!
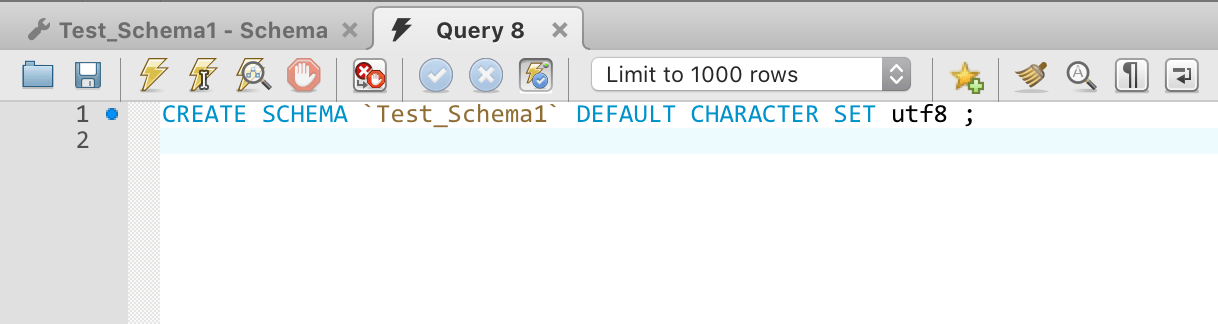
Most GUI steps on MySQL will uncover SQL that you’ve generated VIA using a built-in wizard.
The native features in MySQL offer a glimpse into creating your first schema.
CREATE SCHEMA `Test_Schema1` DEFAULT CHARACTER SET utf8 ;
You can copy and paste this code into a query on MySQL.
If you have MySQL Workbench open, you have a query open!
Paste your code and build Test_Schema2.
Change your Schema1 to Schema2. Click the lightning bolt to execute the query.
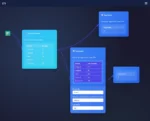
Now you should have two SCHEMAS – be sure to click the refresh button, and both will be present.
It will look like this screenshot below.
Click the tiny refresh button.
Get used to clicking the refresh button on MySQL Workbench and all other database GUI interfaces.
You’re making changes to something living and breathing on your computer, and right now – you have a database on your computer. Congratulations!
Again, the refresh is a normal process, don’t worry if you don’t see your work – especially if you’ve not refreshed your GUI interface, also known as your MySQL Workbench!
Did you expect it would be this easy to create a Schema in your MySQL Workbench on Mac OS?
Lost your MySQL root password on your Mac? Don’t panic! It happens more often than you think.
We are here to help.
Fortunately, the process for resetting it is straightforward. This guide will walk you through the necessary steps to regain access to your MySQL server.
Understanding the Process
The core of the password reset involves stopping the MySQL server, restarting it in safe mode without password checking, connecting as root, updating the password, and then restarting the server normally. Let’s break it down.
Step 1: Stop the MySQL Server
Before you can reset the password, you need to ensure the MySQL server is not running. The method to stop it depends on how you installed and manage MySQL. Here are a few common scenarios:
Using Homebrew: Open your Terminal application and run the following command: Bashbrew services stop mysql
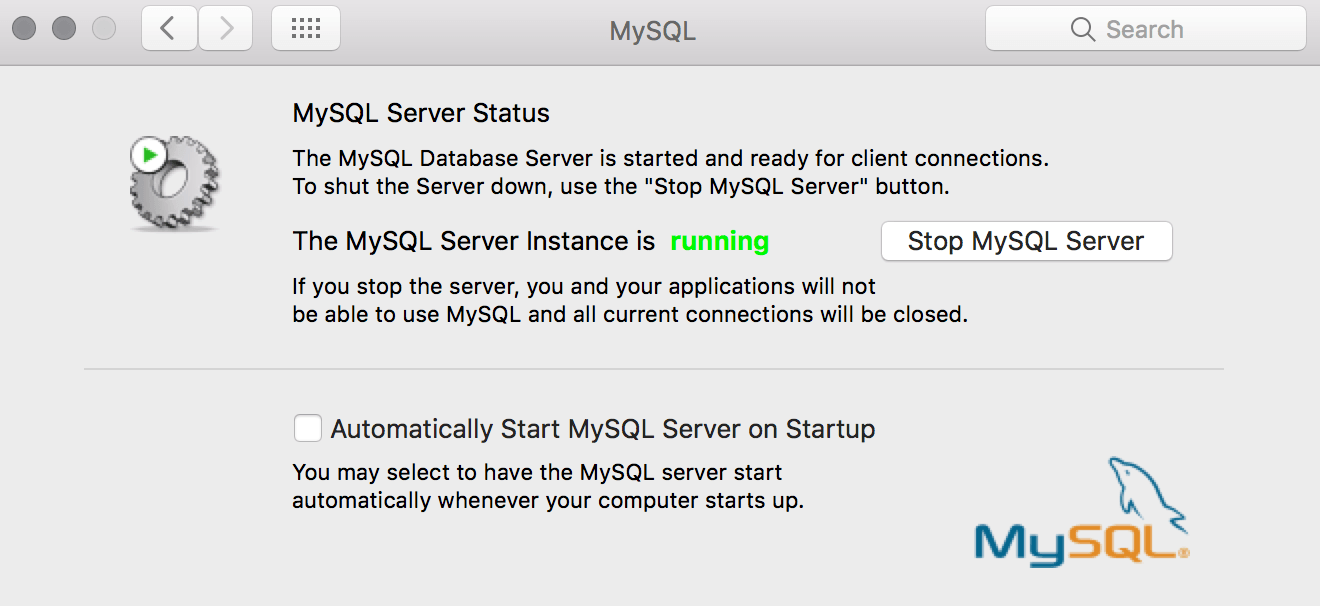
Using the MySQL Preference Pane: If you installed MySQL using the official installer, you might have a preference pane in your System Preferences. Open System Preferences, find the MySQL icon, and click “Stop MySQL Server.”
Using mysqld_safe directly: If you know the location of your MySQL installation, you can try: Bashsudo /usr/local/mysql/support-files/mysql.server stop (Adjust the path if your MySQL installation is in a different location.)
Step 2: Restart MySQL in Safe Mode (Without Password Checking)
Now, you’ll restart the MySQL server with the --skip-grant-tables option. This tells the server to start without loading the grant tables, which contain user privileges and passwords. This allows anyone to connect without a password.
Open a new Terminal window and run one of the following commands, depending on your installation:
Using mysqld_safe: Bash/usr/local/mysql/bin/mysqld_safe --skip-grant-tables &
The & at the end runs the command in the background, allowing you to use the same Terminal window for the next steps.
If mysqld_safe is not in /usr/local/mysql/bin/, try: Bashsudo /usr/local/mysql/bin/mysqld --skip-grant-tables --user=mysql & Again, adjust the path if necessary. Important: Keep this Terminal window open while you proceed to the next steps. Closing it will likely shut down the MySQL server.
Step 3: Connect to MySQL as Root
With the server running in safe mode, you can now connect to the MySQL server as the root user without being prompted for a password. Open a new Terminal window and enter:
Bash
mysql -u root
You should see the MySQL command prompt (mysql>).
Step 4: Update the Root Password
Now that you’re connected, you can update the root password. The specific command depends on your MySQL version:
MySQL 5.7.6 and later: Use the ALTER USER statement: SQLALTER USER 'root'@'localhost' IDENTIFIED BY 'YourNewPassword'; Replace 'YourNewPassword' with the new password you want to set. Remember to use strong and unique passwords in a production environment.
MySQL 5.7.5 and earlier: Use the UPDATE statement on the mysql.user table: SQLUPDATE mysql.user SET Password=PASSWORD('YourNewPassword') WHERE User='root'; FLUSH PRIVILEGES; Again, replace 'YourNewPassword' with your desired new password. FLUSH PRIVILEGES; reloads the grant tables, ensuring your changes take effect immediately.
Step 5: Exit the MySQL Client
Once you’ve successfully updated the password, exit the MySQL client by typing:
SQL
exit
and pressing Enter.
Step 6: Stop the MySQL Server (Normal Mode)
Now, you need to stop the MySQL server that’s running in safe mode. Go back to the Terminal window where you started mysqld_safe (or the mysqld command) and press Ctrl+C to stop the process.
If you used brew services start mysql earlier, you can use:
Bash
brew services stop mysql
If you used the MySQL Preference Pane, go back and click “Stop MySQL Server.”
Step 7: Restart the MySQL Server (Normal Mode)
Finally, restart the MySQL server in its normal mode. Use the same method you used in Step 1 to stop it, but this time use the “start” command:
Using Homebrew: Bashbrew services start mysql
Using the MySQL Preference Pane: Click “Start MySQL Server.”
Using mysql.server: Bashsudo /usr/local/mysql/support-files/mysql.server start
Step 8: Verify the New Password
You should now be able to connect to your MySQL server using the new root password. Open a new Terminal window and try connecting:
Bash
mysql -u root -p
You will be prompted to enter your password. Type the new password you set in Step 4 and press Enter. If you see the mysql> prompt, you have successfully reset your MySQL root password!
Important Considerations:
Security: Running MySQL with --skip-grant-tables is a security risk. Ensure you stop the server and restart it in normal mode as soon as you’ve reset the password.
File Permissions: If you encounter permission issues during this process, you might need to adjust file ownership or permissions for your MySQL data directory.
MySQL Version: While the core process remains similar, the specific commands might vary slightly depending on your MySQL version. Refer to the official MySQL documentation for your version if you encounter issues.
Backup: It’s always a good practice to have a backup of your MySQL data before making any significant changes.
If you’ve misplaced it, there’s a quick process to dig through.
Let’s start with the easy method – did you save it somewhere?
Click the magnifying glass on the top right and search for it, if you built notes for your password.
If you took notes of your Root Password – try searching for it first.
Here’s the text for the temporary password that you can search on your mac.
[Note] A temporary password is generated for root@localhost: rt4rvI,%lfr<
Maybe you forgot your Mac OS X ‘ROOT’ password? Or potentially didn’t save the Temporary password in your notes?
If you did save your root password, it’s likely you saved it in a similar fashion to us.
How to Reset MySQL root password on your Mac
Here’s a quick how to reset mysql root password on your mac tech tutorial!
1. Stop the mysqld server. Typically this can be done by from ‘System Prefrences’ > MySQL > ‘Stop MySQL Server’
2. Start the server in safe mode with privilege bypass
GNU General Public Licenses – essentially you’re free to change the product however you want, use it however you want, and not get hit with a price down the road. You create your limitations and have the flexibility to solve them as you see fit.
Click Continue and Agree to Install MySQL on your Mac
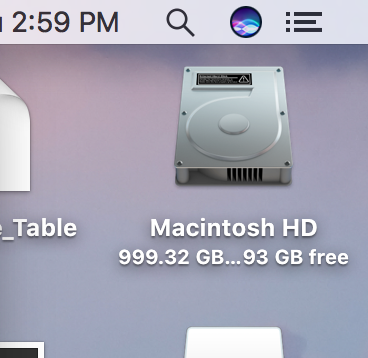
Change installation directory, if you have multiple drives, this will apply to you.
Click Install. If you have a password protection on your Mac installations, you will need to provide that password.
Save root password by copy and pasting to your notepad.
Close.
Install MySQL Mac – When you’re installing MySQL, you’re given a root password, and also CMD+A and CMD+C will copy this password for you to paste.
You thought there would be more?
MySQL, founded in 1995, and now it’s installed on your MacBook Pro! Good luck!
Installing databases is a mandatory skill belt notch – Installing MySQL on Mac is Easy!
Although it’s a necessary skill belt notch for nearly every Fortune 500+ company, I find that most people have no Data experience and rather are very good at using the software.
Data scientists, data analysts, Directors of Analytics, CIO, etc. I’ve seen hundreds of them in person, and they had never installed a database before.
Even CIO’s for 100million+ companies have no idea what a database does or how to use it. They have an ear full of sales and often buy wrong solutions that require fixing in the future.
They had a title with the word data in it!
Install MySQL Mac – Dependency on data products generates broken environments
After working in classic business enterprises and also fast booming companies.
I’ve noticed fundamentals missing from most ‘data experts’ skill belts and yet they are the expert at the entire organization.
Shadow IT internal and external make an absolute mess of Data environments and keep us very busy with fixing their mistakes.
Everyone seems to know enough to say the verbiage.
Regrettably, when the rubber meets the road, they are plugging their SQL into Notepad++ and spending weeks on easy SQL because the fundamentals were never acquired.
Installing a database on a computer takes <1minute.
Installing a database on your computer takes <1minute, yet nearly every expert I’ve come across has never installed a database and runs away from SQL discussions.
Why is it mandatory to know how to install a database?
Installing a database is the bread and butter of any reporting tool.
If you do not have data experience and you’re plugging data in a tool like Tableau Desktop – be sure to understand the impacts of your usage.
Being able to install MySQL on Mac might be your next step!
Installing a database like MySQL on your computer gives you an opportunity to see what it takes to manage your database, and also see the impacts of your usage when connected to the data live!
How do you query your local database? Do you use another database?
Start MySQL on Mac OSX or build a farm of spreadsheets? We will be walking you through building your database on your personal machine. Start MySQL on Mac OSX and Get Collecting! Ever considered collecting data to process MySQL? When ramping up you need to start the MySQL instance on your Mac OSX. This is a quick guide!
By the end of this blog, you will understand how to get your MySQL Server started on your Mac OS.
Now that you have MySQL on your Mac, what’s next? Start MySQL on Mac OSX!